

When we first started to discuss Lola’s playroom, I knew I wanted it to have a certain feeling. I wanted it to feel magical and be a place that her imagination could run wild. I also wanted it to be a place that she would look back on with fond memories and whimsy. If you saw the first post we made about the playroom (if not you can check it out here) I had made a mood board with items I knew I wanted to include in the overall theme. I wanted things that were fairytale-ish. I also wanted to be sure that the room would stay age appropriate for years to come and wouldn’t be too babyish or Disney-ized. Lola loves those things now, but in a few years I don’t want to be re-doing that room because she’s outgrown her old friends.
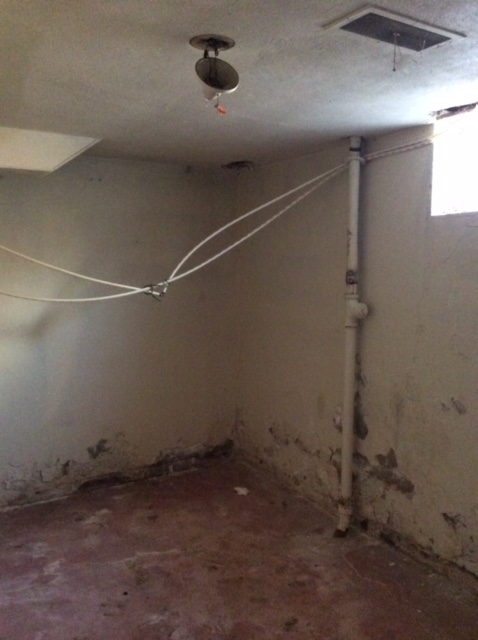
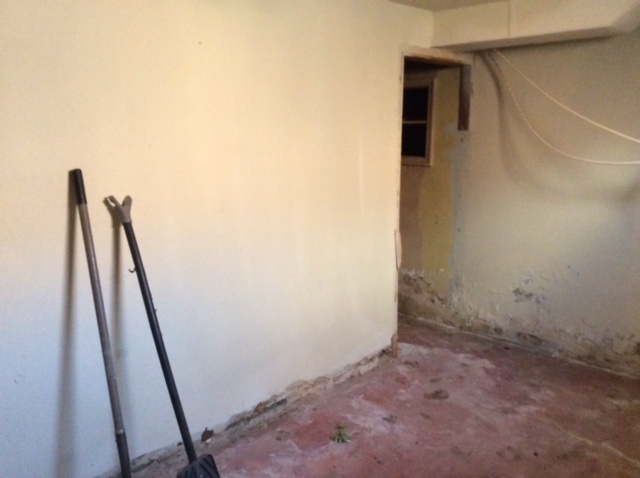
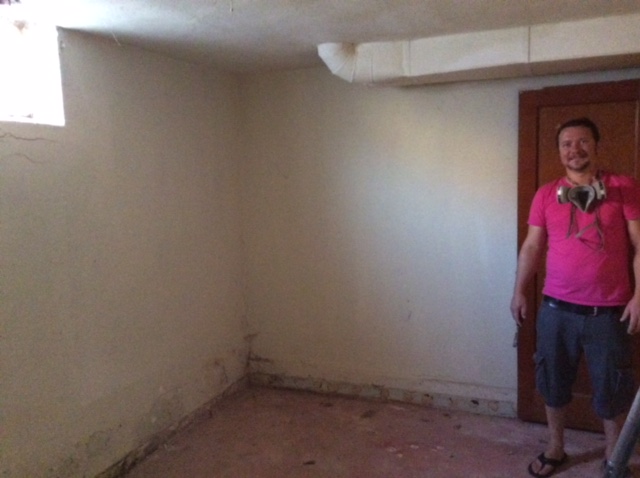
Here’s a reminder of how it looked before:
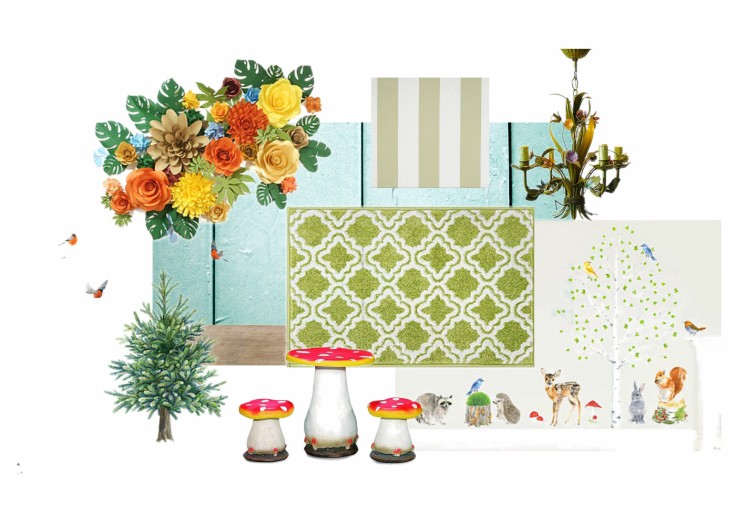
And here’s a reminder of the mood board I designed:
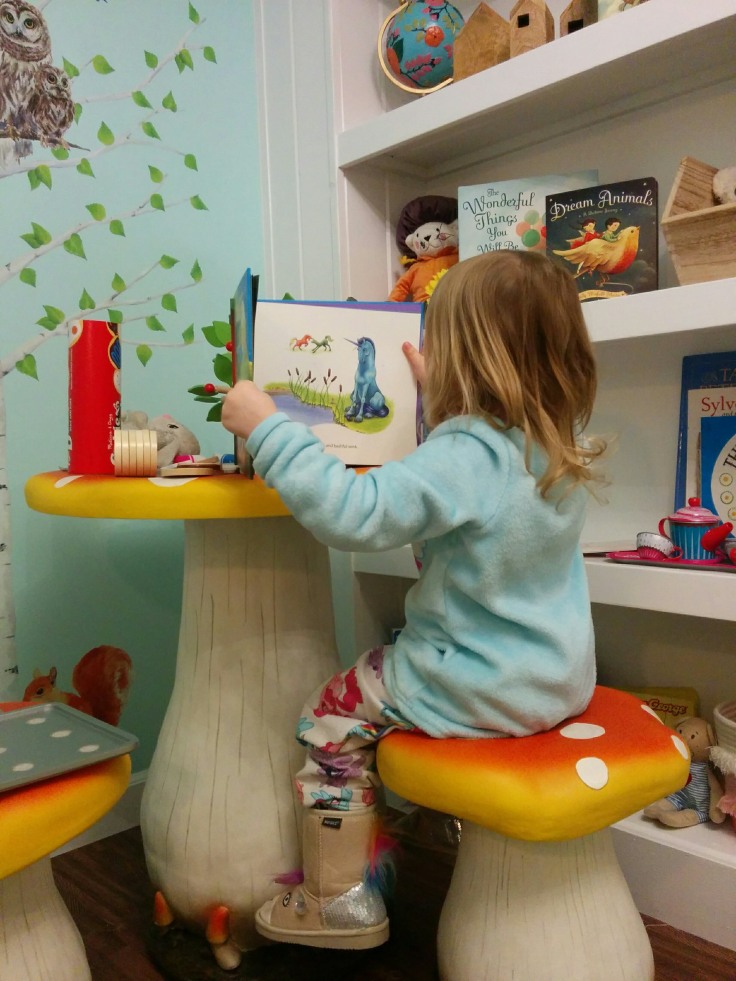
For starters, I knew for sure that I wanted a toadstool table and chairs set because what is more whimsical than that! When I first started looking, I could only find sets that were upwards of $400 smakeroos and that was way out of our budget. I had resigned to the fact that we could make one but with all of the other build projects going on I really was hoping to avoid that. Then I stumbled across this beauty for $119 at RC Willey and I saved another $25 for signing up for the newsletter as well! I chose to pick it up in store to save on shipping costs too. I couldn’t be more thrilled!
Affiliate links have been used.

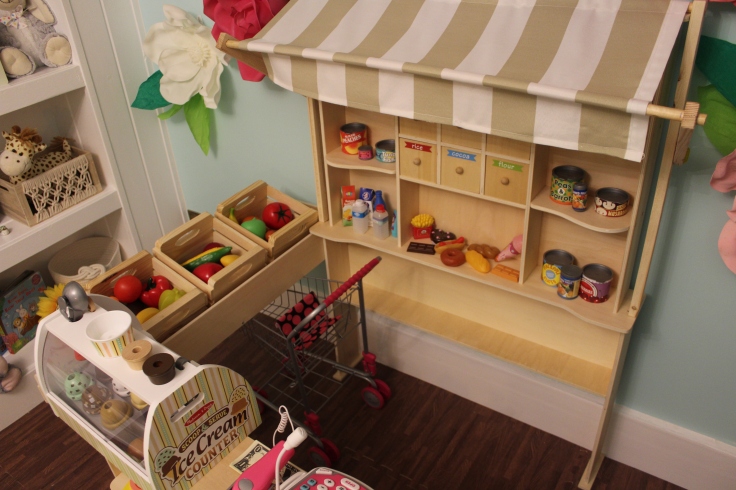
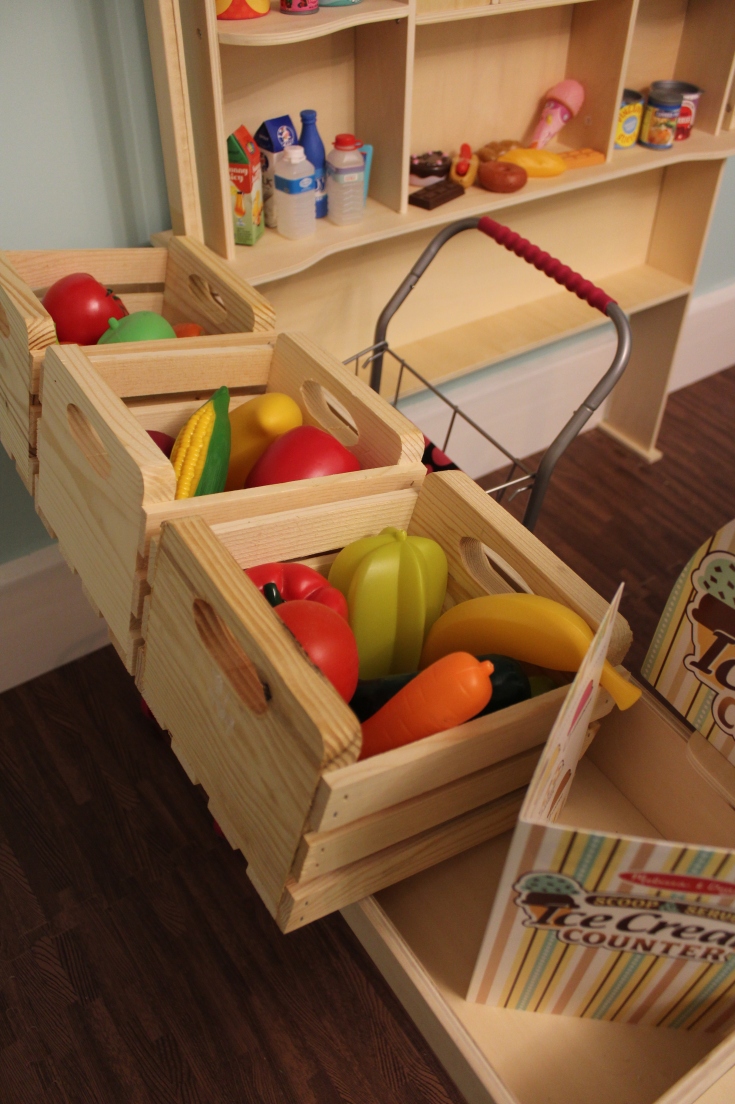
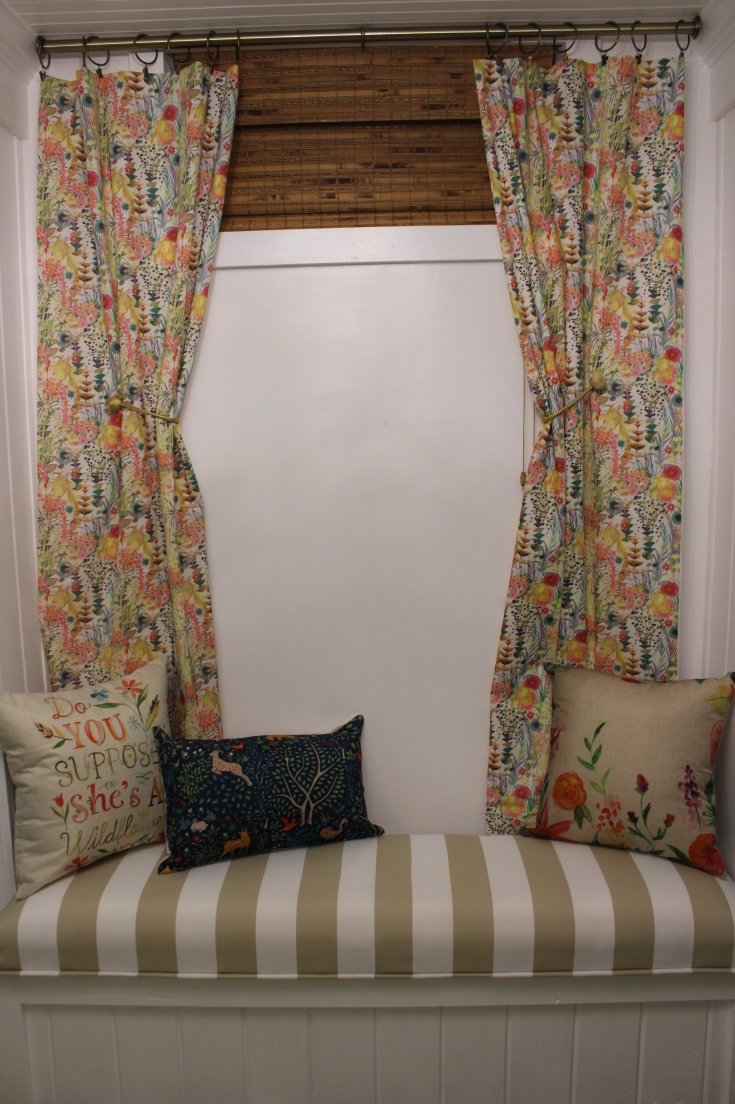
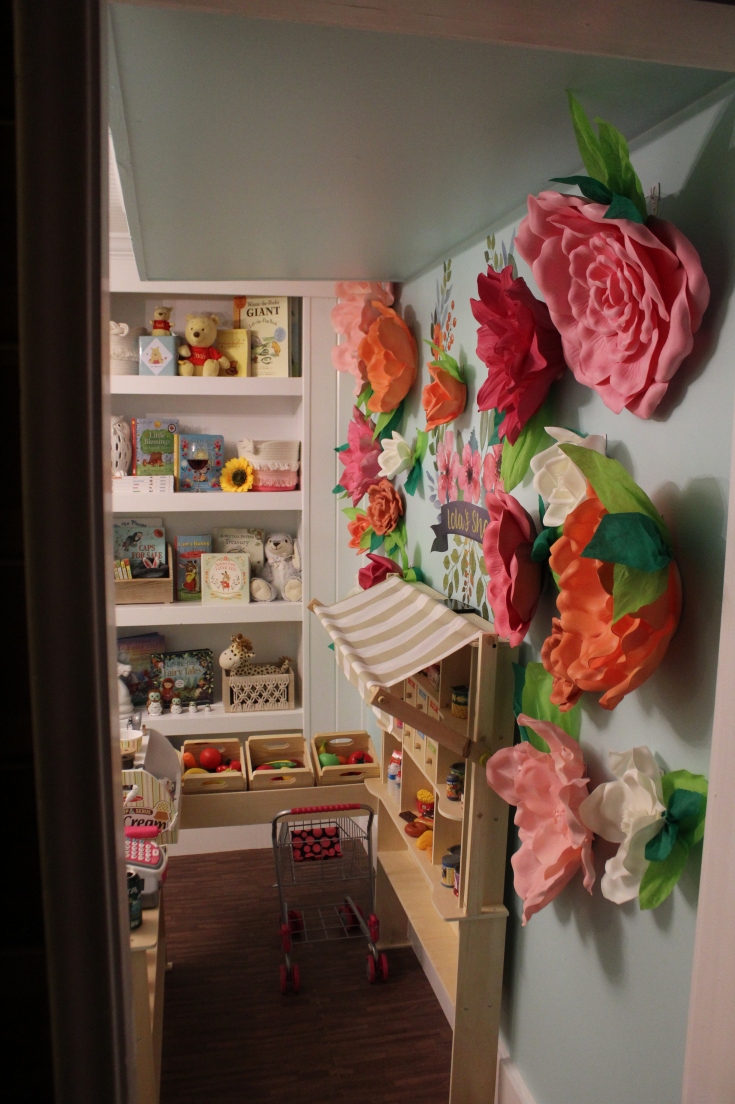
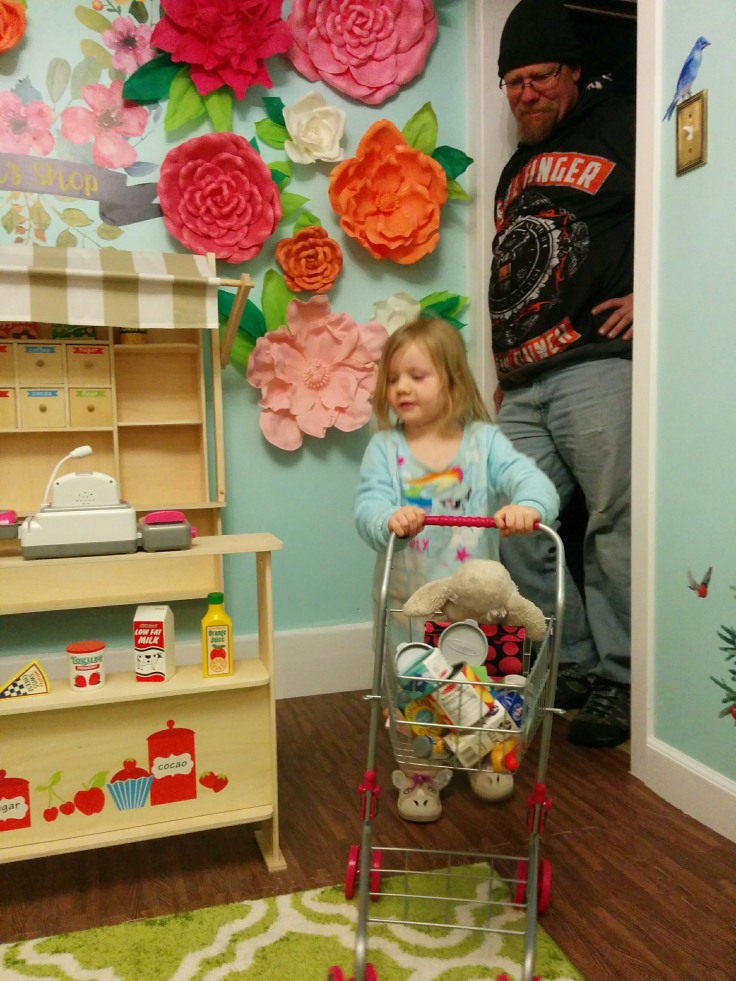
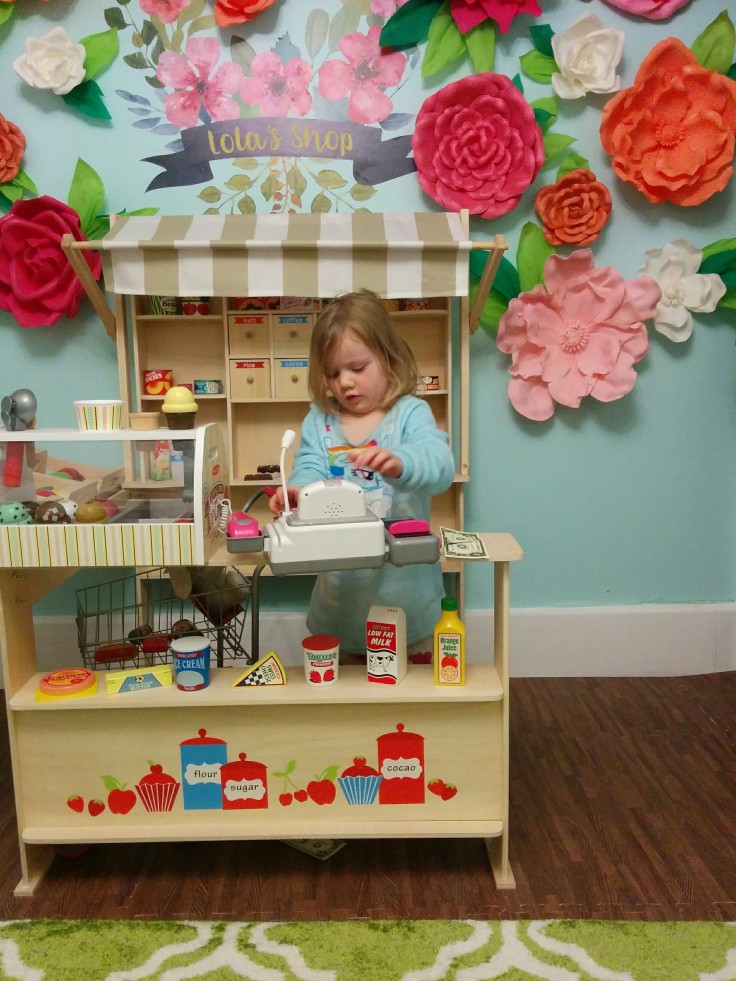
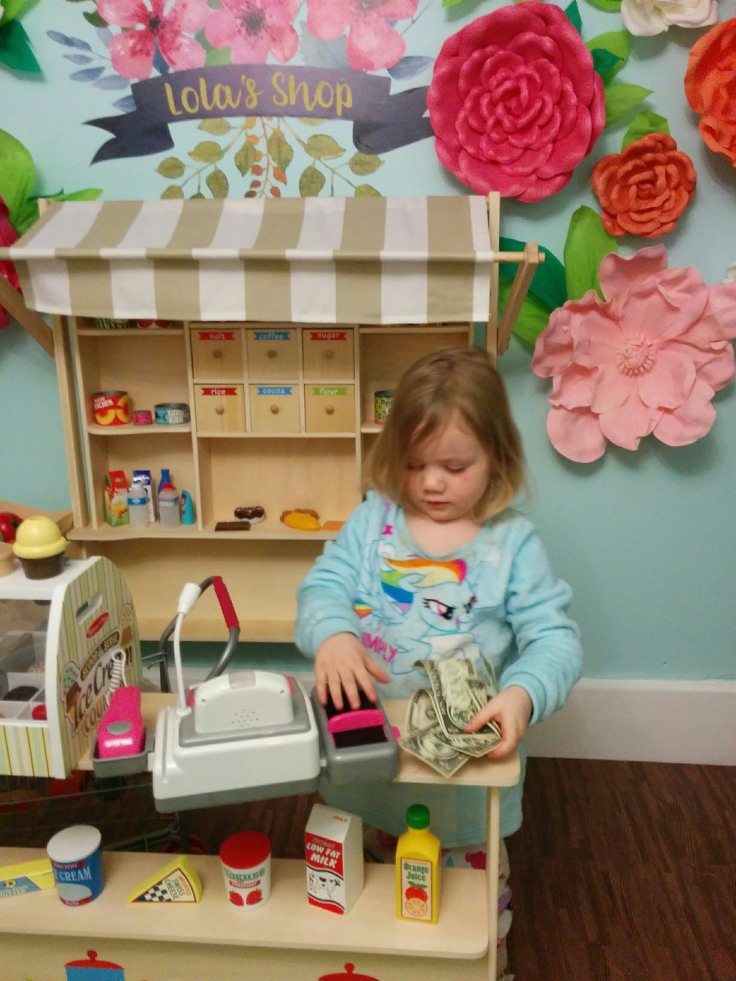
For Lola’s market I knew I wanted the shop to have a striped awning to give it a little bit of European flare but felt like a traditional black and white stripe would be a little to bold in the room and would take away from some of the other features that I wanted to have stand out. I started with this pretty basic wooden market from Amazon and had Ammon add a few pieces to make a place for me to add fabric for an awning. I purchased this fabric from Fabric.com and sewed the awning. I used the same fabric to cover the top of the storage bench/toy chest he built in between the bookshelves. I also added some wooden crates from Michael’s and filled them up with play fruits and veggies. Her shop wouldn’t have been complete with out her very own shopping cart and ice cream parlor to boot! Seriously, she sells that stuff for $300 bucks a scoop.

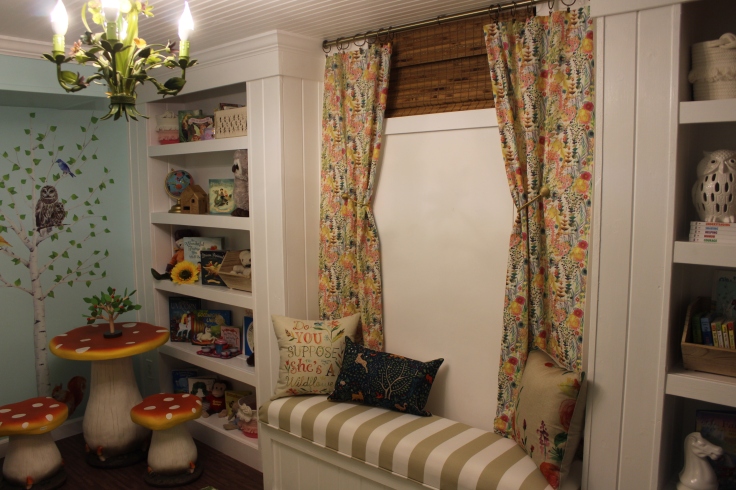
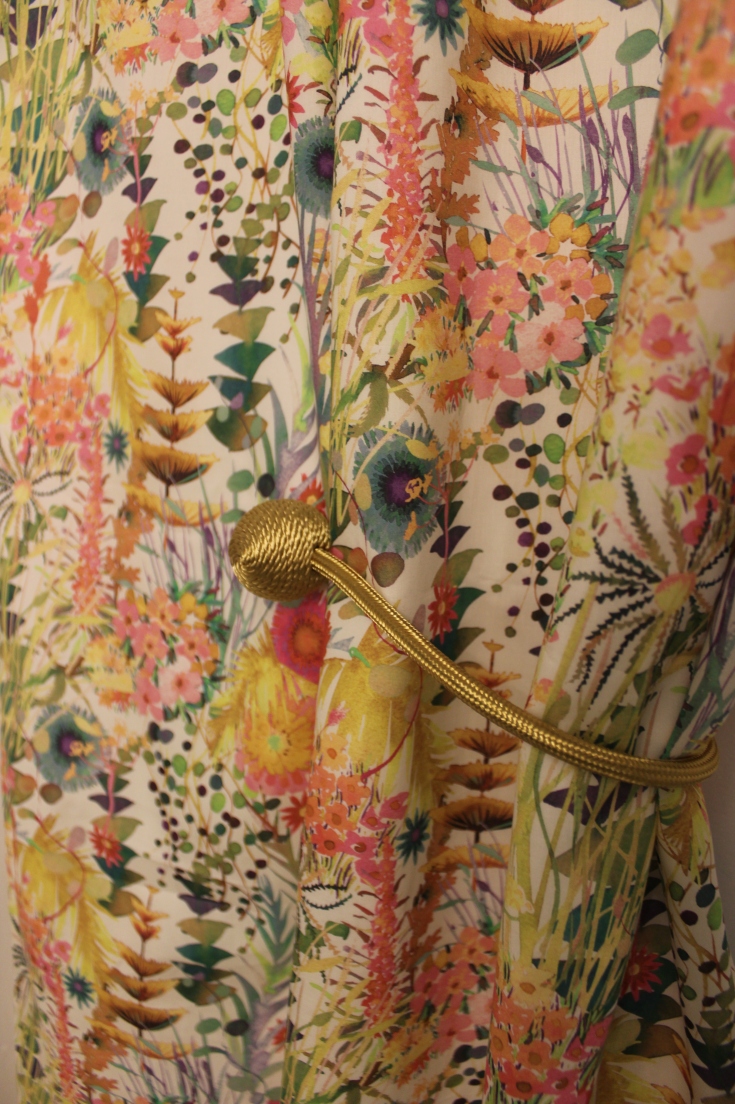
While I was searching for the fabric for the awning and bench seat, I stumbled across this beautiful fabric and knew that I had to have it for the curtains. I sewed the curtains without any pocket for a rod because I knew I wanted to hang them with curtain rings. I used a plain white muslin for the backing to add some weight as well as privacy. If you can sew a rectangle, you can make these curtains too! I think any room I design I struggle with curtains because I feel like they are such a great opportunity to really make or break a space. I can never find something pre-made that I love so I usually end up making them myself.
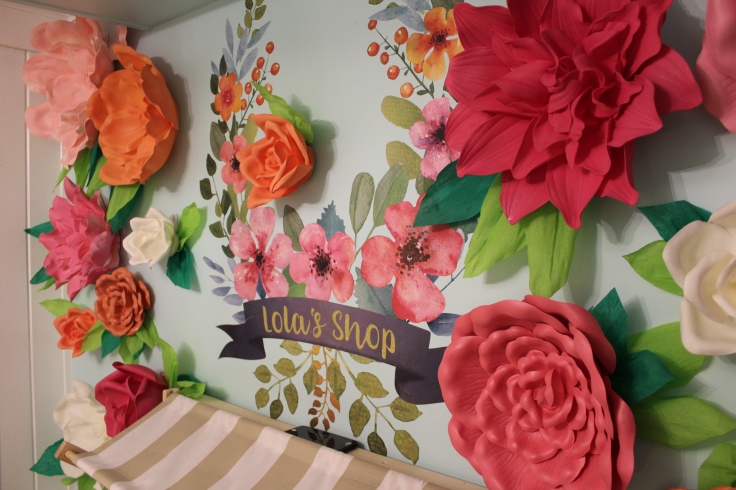
Anyway, on to the flower wall. When I first designed Lola’s nursery (check it out here) I really, really wanted to add some giant flowers, Alice in Wonderland style. I couldn’t find anything I loved in my price range so I bought some paper flowers on Ebay and added some large foam roses and arranged them under the window valance box. I ended up loving the looked but was always a little disappointed that I didn’t get quite what I was after so I was determined to try to make it work in the playroom. I started off with the wall decal and wanted to add more 3D flowers on the wall to really make an impact. The problem is, I couldn’t find flowers as large as I wanted in the color scheme I wanted that also didn’t cost an arm and a leg. Then I found these foam flowers on Etsy. They were more durable than the paper flowers I had first been eyeing, only problem was that they were all white! I put the DIY’er in me to use and purchased a variety of fabric spray paints and regular spray paints in the color scheme I wanted and went to town. I love the way they turned out and was so glad I got to control the exact balance of colors I wanted. I left some of them white because I wanted that in the color scheme to begin with. I added some leaves that I made with some crepe paper from Zurchers and just hot glued them to the flowers and mounted the flowers with some 3M hooks from the hardware store.
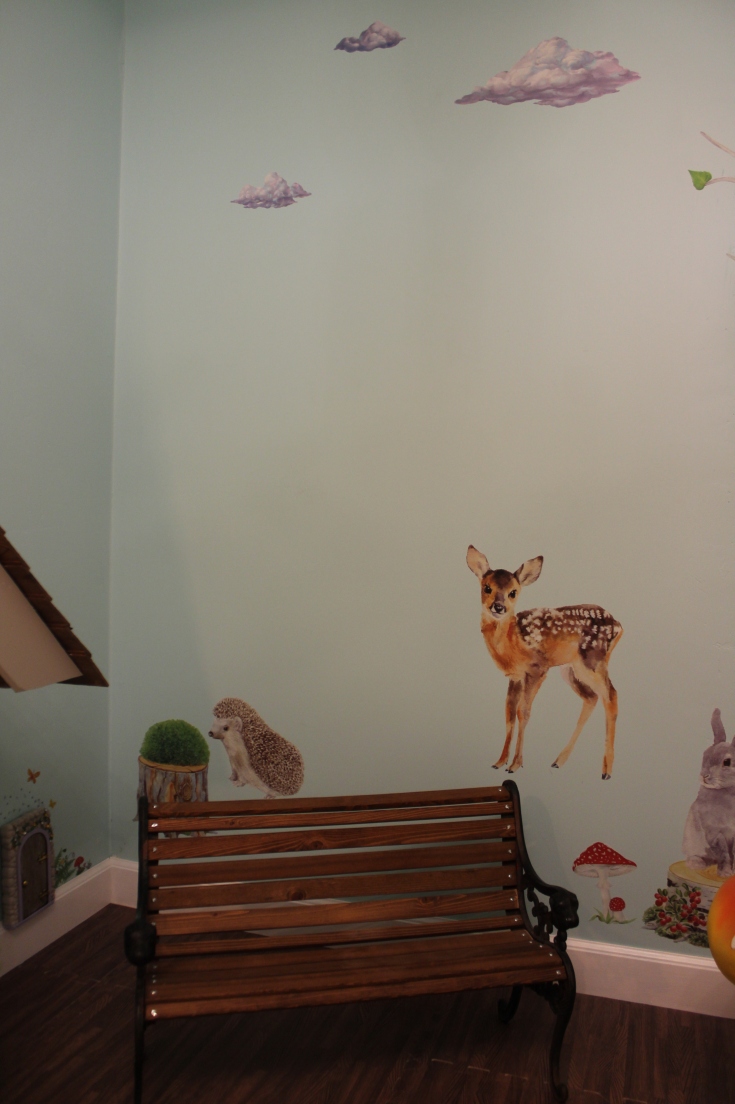
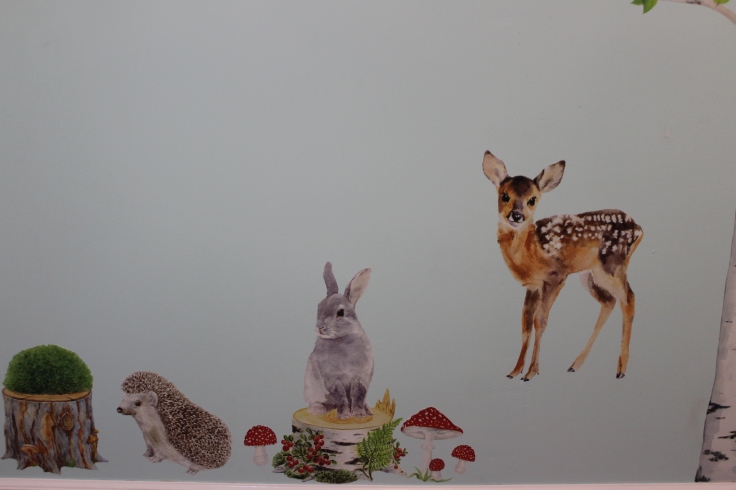
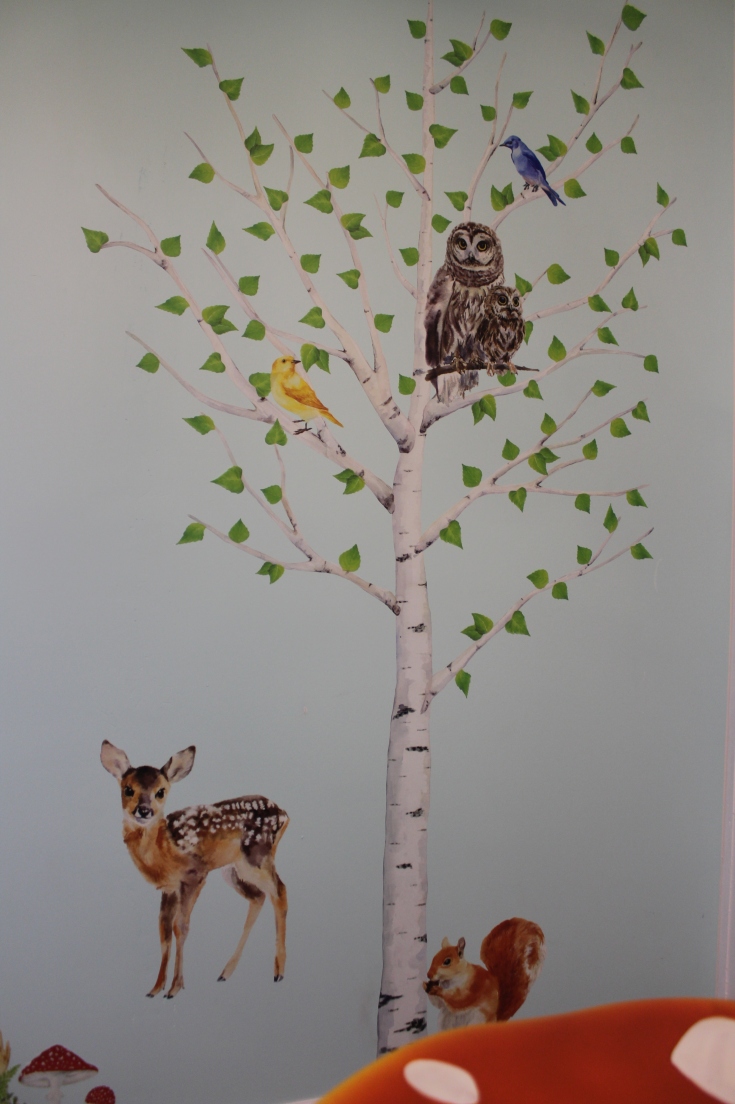
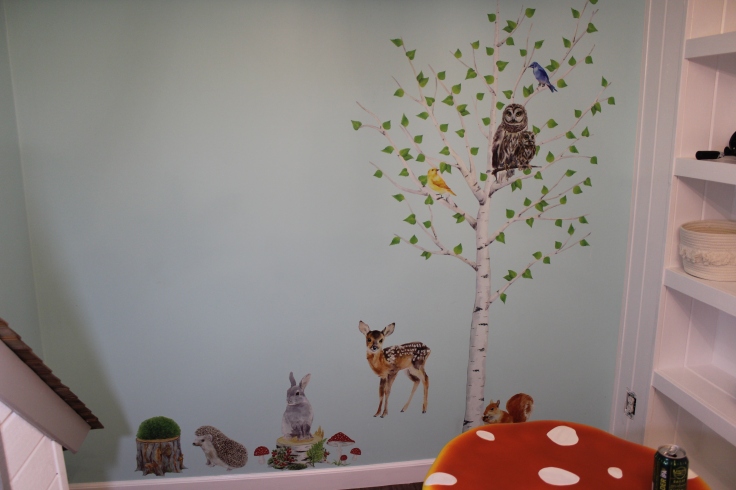
On the other walls I wanted to add some forest friends but I knew there was no way on this sweet earth that I could paint them myself. I knew decals would be the way to go but I really wanted to find something that had more of a water-color look than a cartoon-ish look. I found these beauties on Etsy and it was love at first sight! Their work is seriously amazing and I couldn’t have dreamed of something better. The backdrop for these beauties is Tame Teal by Sherwin Williams. Ammon made the cute little kid-size park bench and I knew it was meant for this space.
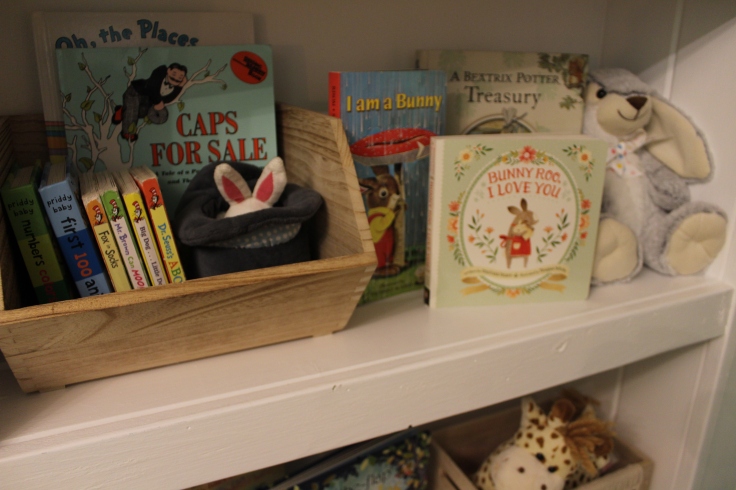
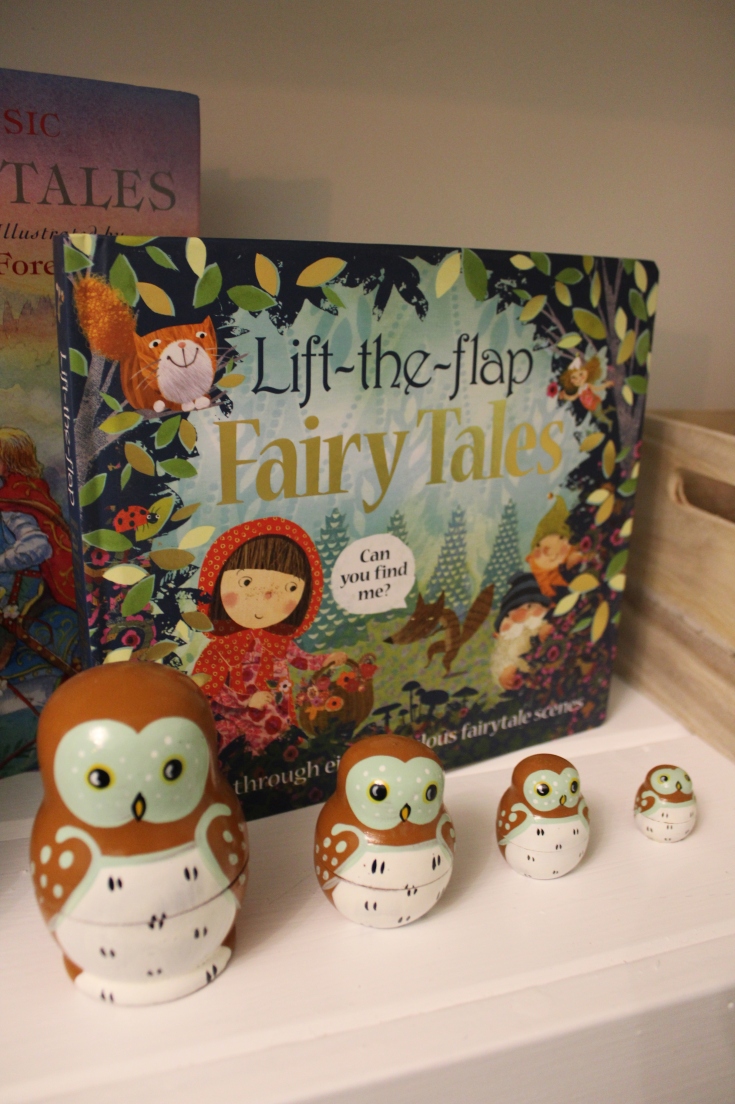
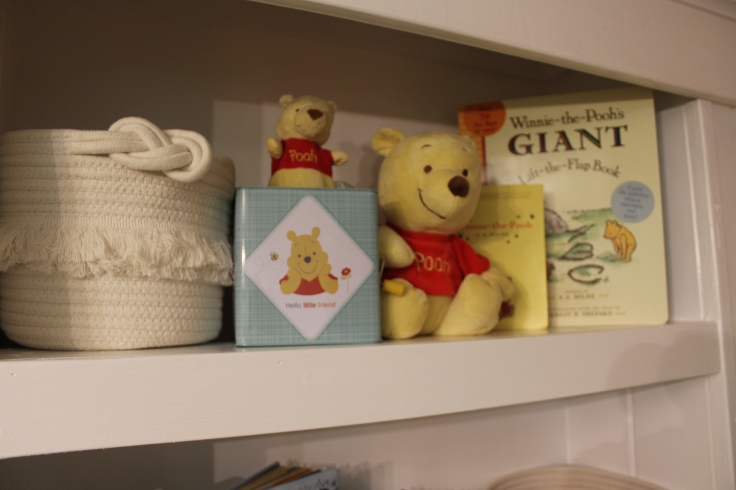
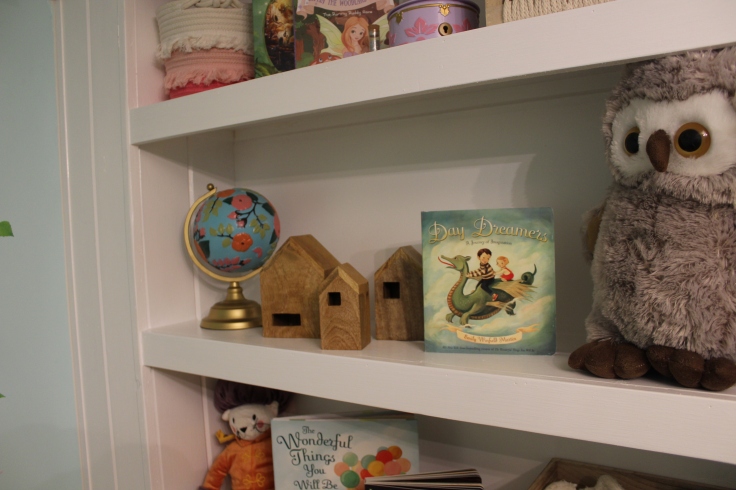
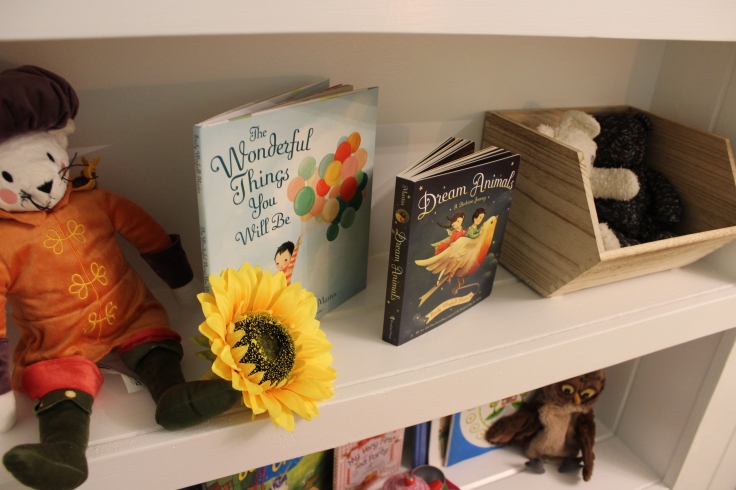
The bookshelves were custom-built by Ammon and turned out even more amazing than I thought they could. Check out this post for the ‘deets. I added accessories from Target, Home Goods, Hobby Lobby and added in some favorites we already had. My favorite part is the bin with both mine and Ammon’s favorite childhood teddy bears that we each kept to pass onto Lola; Buddy and Pepper. The glass of wine was only a temporary accessory 😉
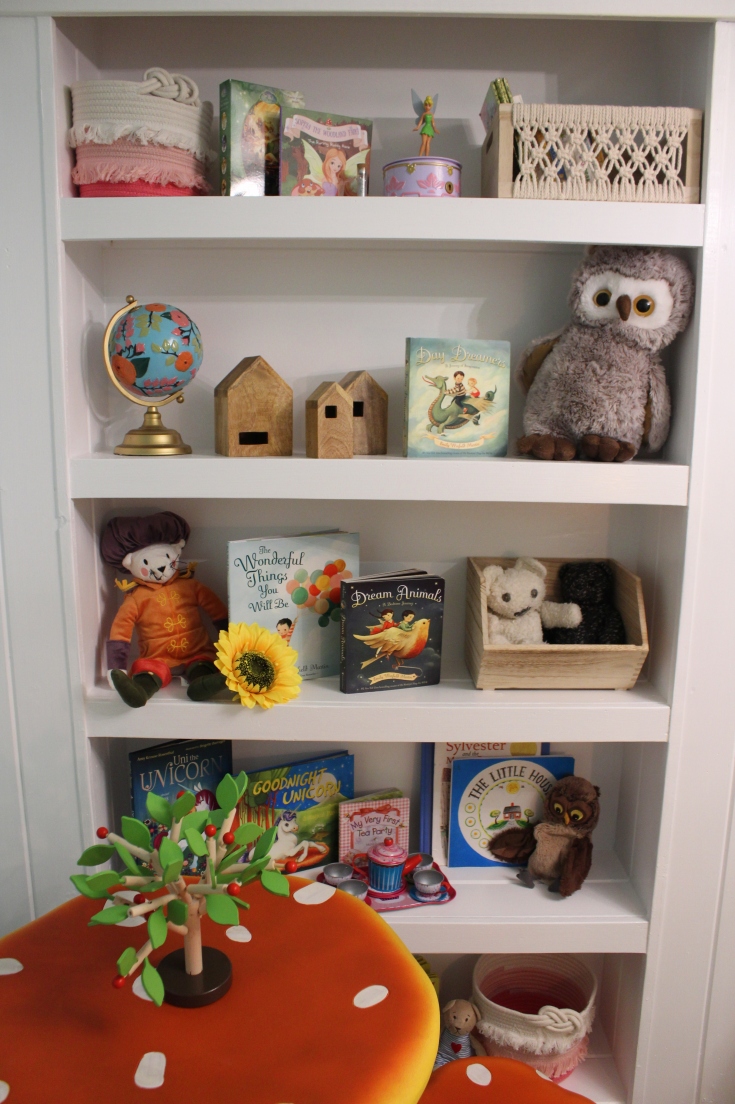
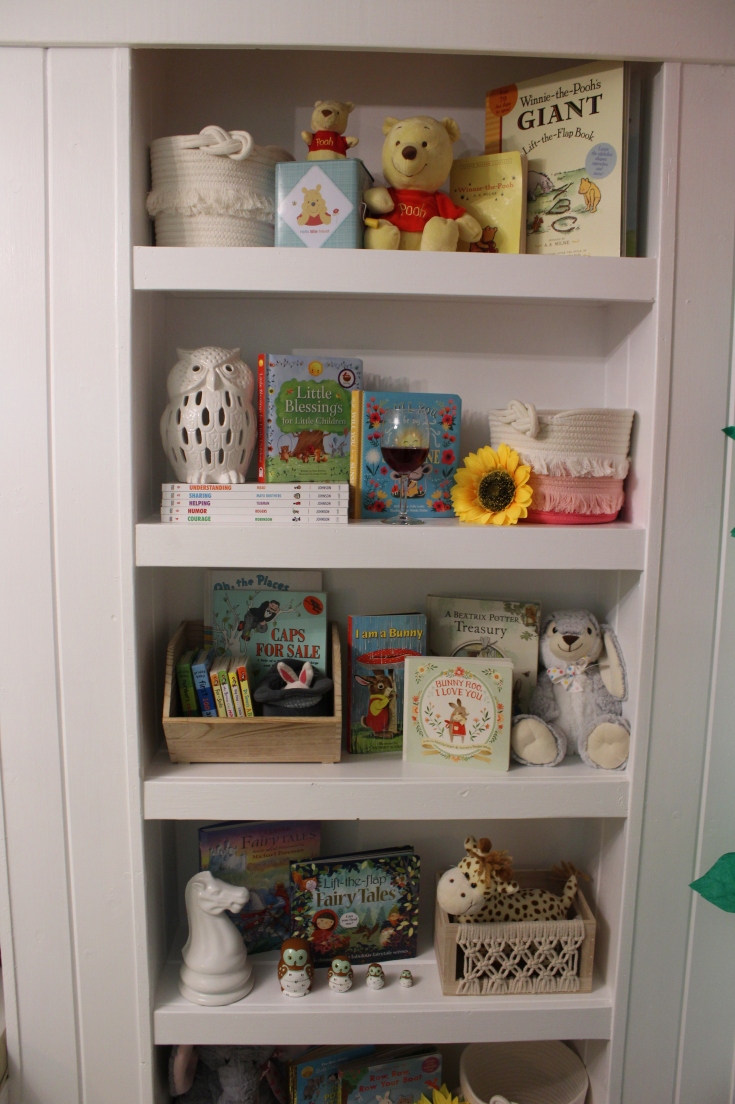
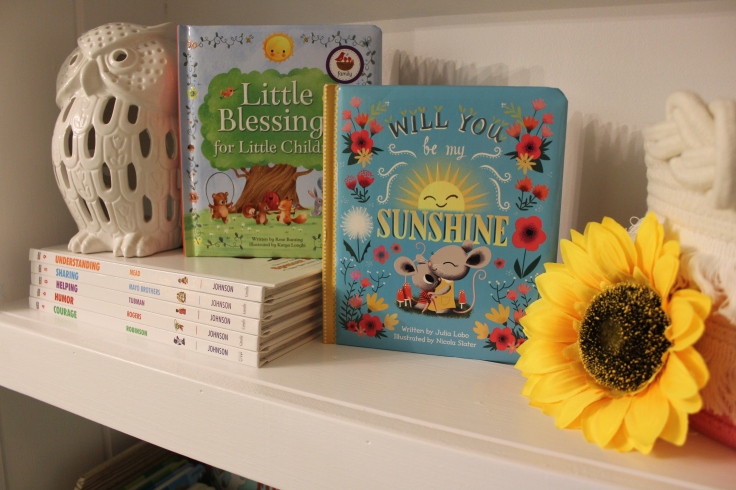
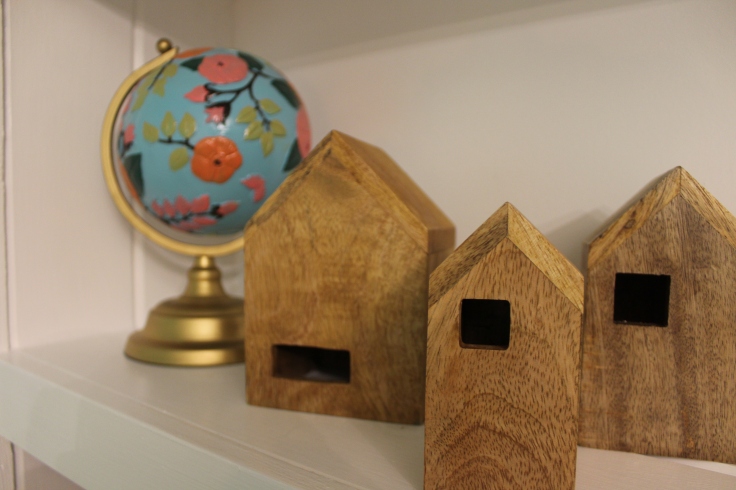
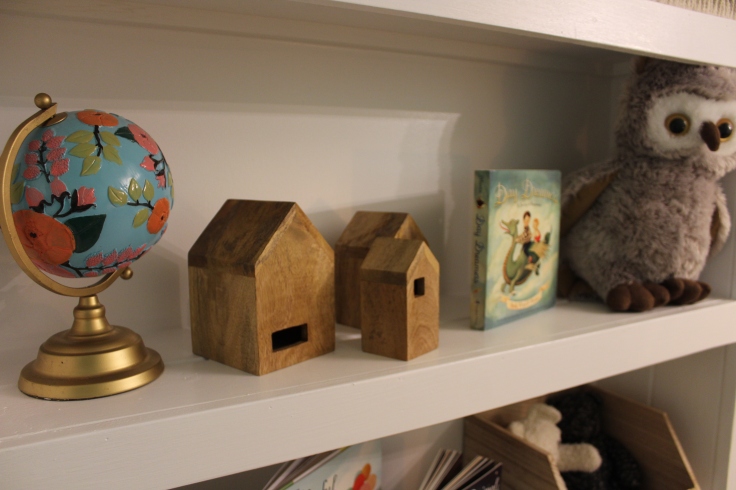
Here are some links to some of my fave accessories:


Wooden Houses Decorative Basket

 Decorative Basket The Wonderful Things You Will Be


Since I did want this to have a foresty/Alice in Wonderland feel I wanted to do something grass-like on the floor but didn’t just want a green shag rug (even though it would have been a great ode to the carpet that was originally in this room!). The bright green trellis rug I found on Amazon was the perfect touch. The floor underneath it is basically foam puzzle board flooring. I love the look of it and it’s so great for the kiddos to play on. The wood grain look gives it such an upgrade and it was super easy to install. Plus, since this is a basement, if we do have any water issues, this is easy to remove and clean up or easily replace.
Wood grain foam interlocking flooring
I also knew from the beginning that I wanted to have either a gold crystal chandelier or a vintage tole chandelier with the beautiful metal flowers. After looking around I found this wonderful piece on Etsy. If you’ve read our other posts then you know I have a particular affinity for lighting. I seriously feel like the lighting fixtures in our home are like my children and I’m pretty certain that if we ever sell our home that I will be gutting it of the lighting fixtures and replacing them before we list because I just can’t bare the thought of parting with any of them! This one is seriously a gem. It is truly a vintage European fixture so it took a few trips to some specialty light shops to get some reducers so that I could add some LED bulbs to bring down the wattage without sacrificing the light I needed in that room. Because of the small window and the fact that it’s in the basement, the light has to be on anytime of day so it was key that the bulbs give me the maximum lumens for the minimum wattage.
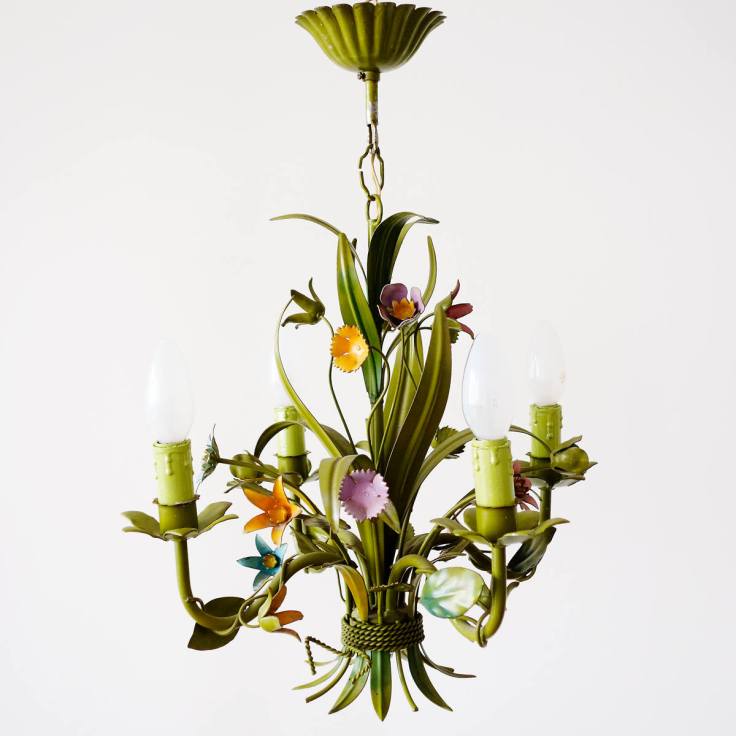
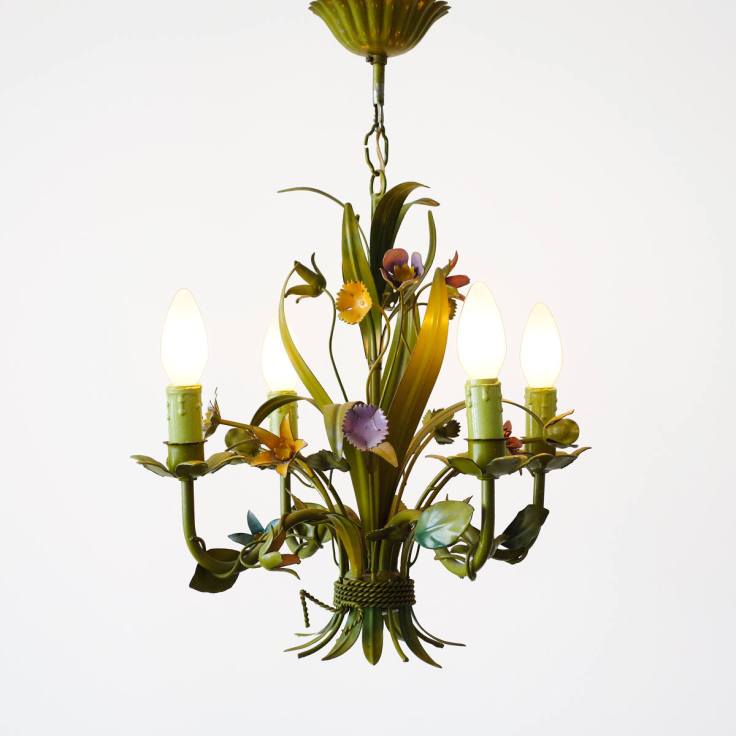

Chandelier from Lasting Living on Etsy (they have so many great vintage lighting options!)
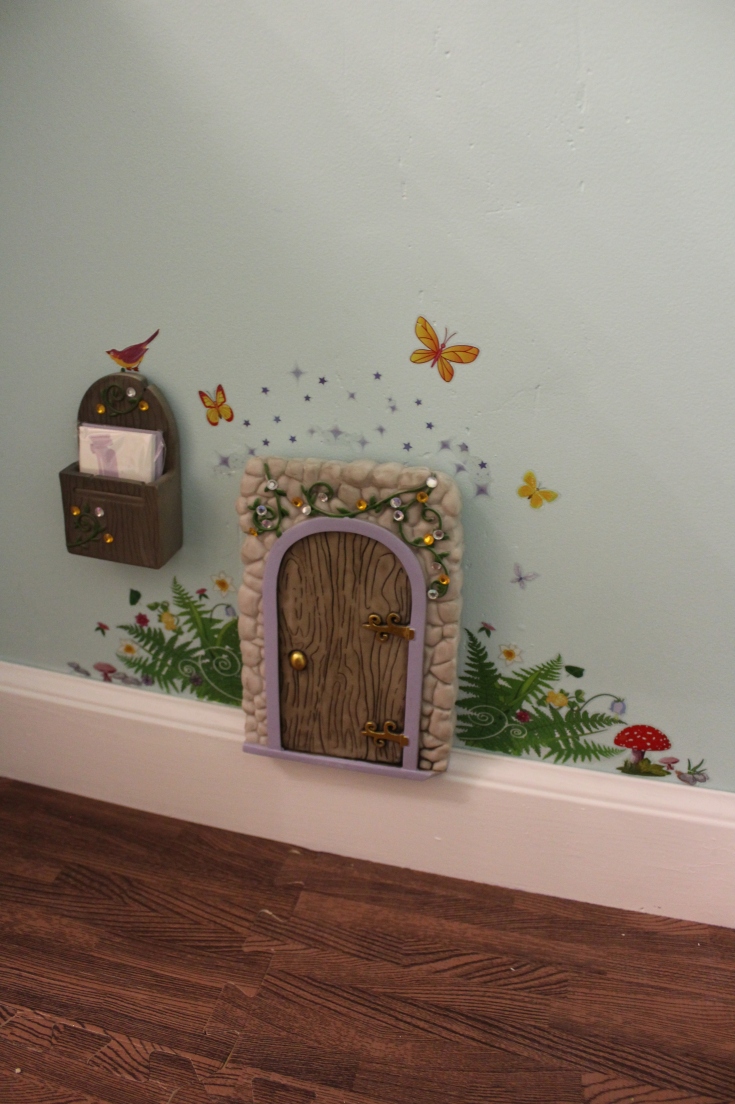
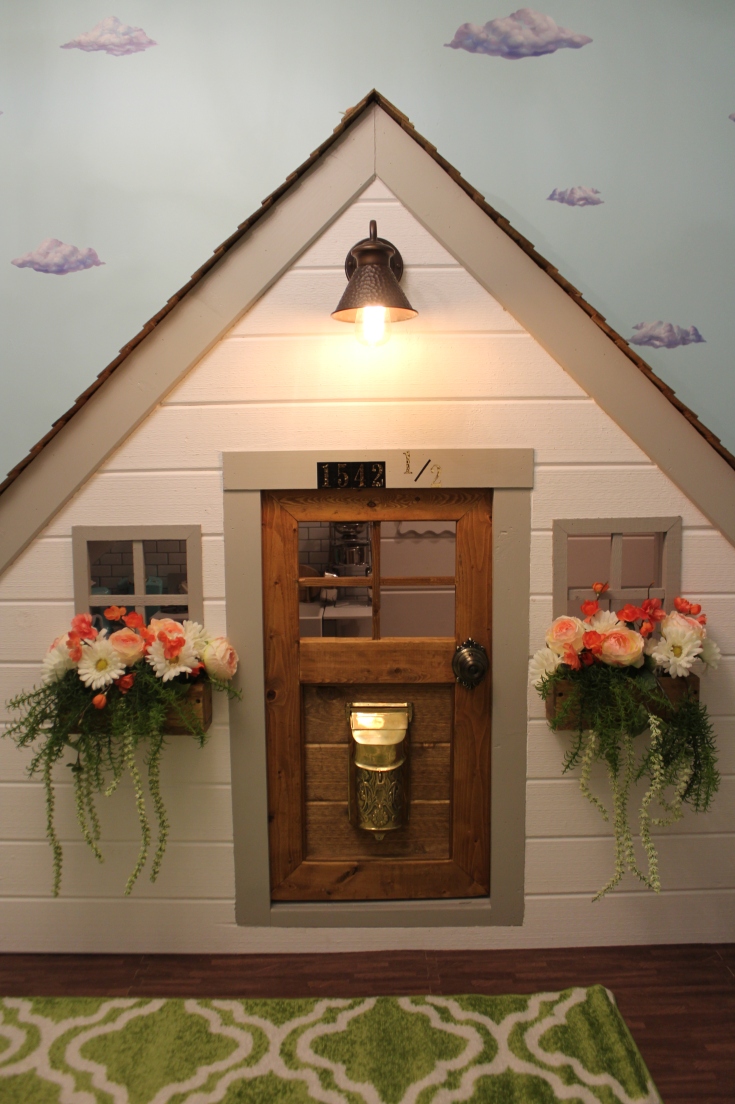
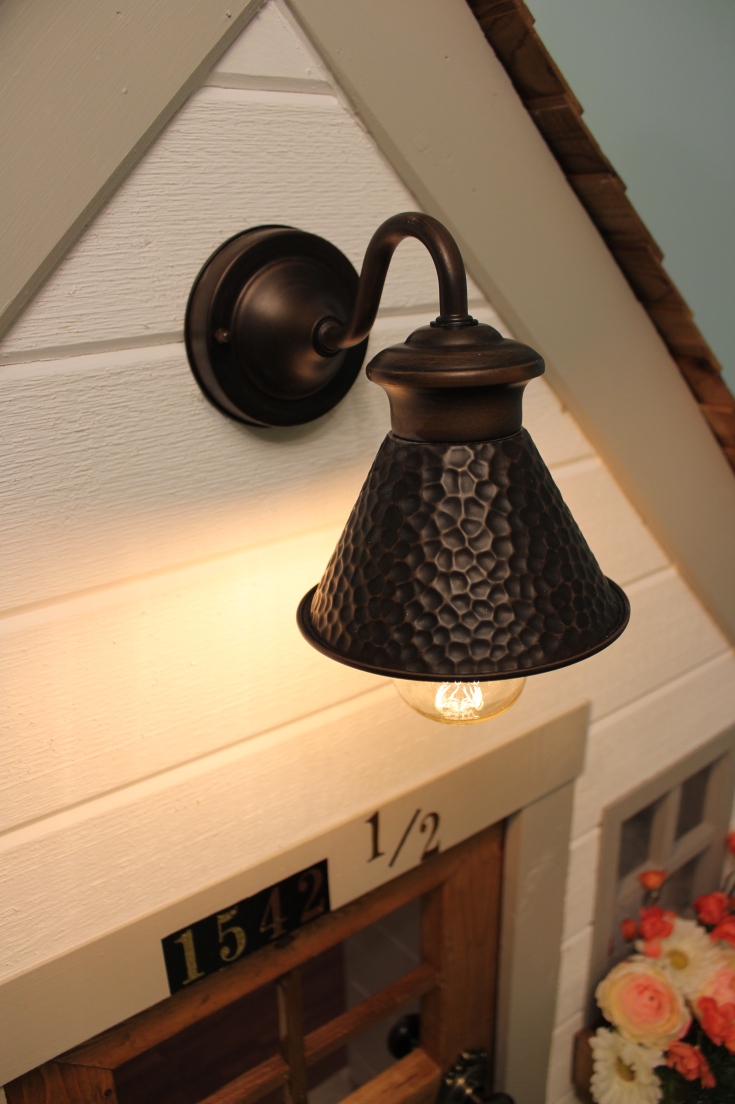
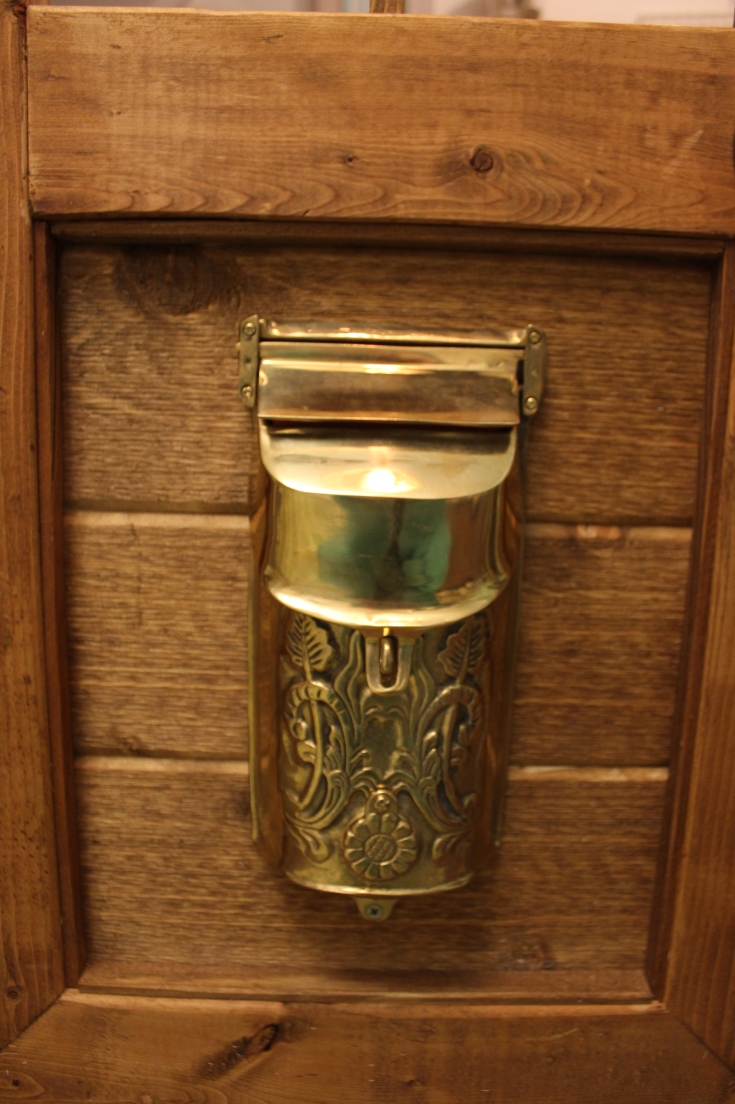
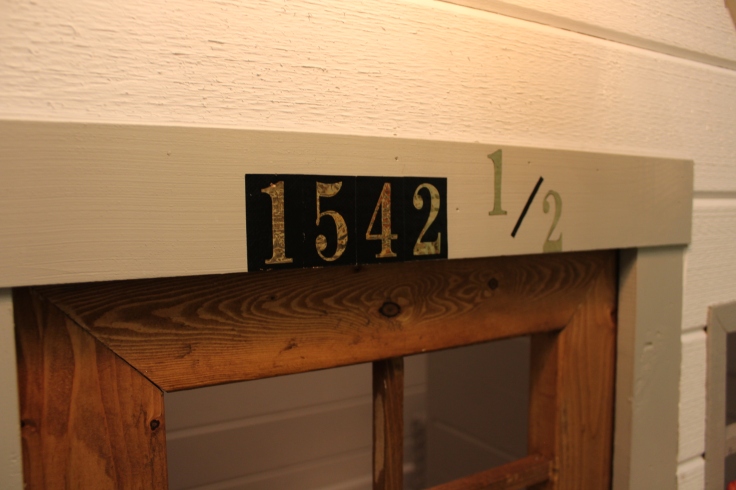
I love the way the playhouse turned out which was the reason we determined this spot would be a playroom to begin with. I love the planter boxes Ammon built and the flowers I added (from Michaels). I really wanted her to feel like this was her own miniature house, and not just a plastic knock-off (not that there’s anything wrong with Fischer-Price, just not what we were going for). The mailbox is a vintage brass piece I found on Ebay and we added some address #’s from the hardware store.

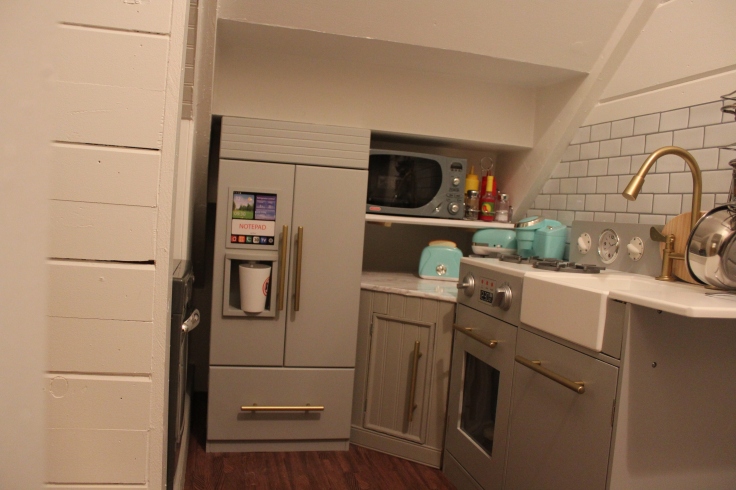
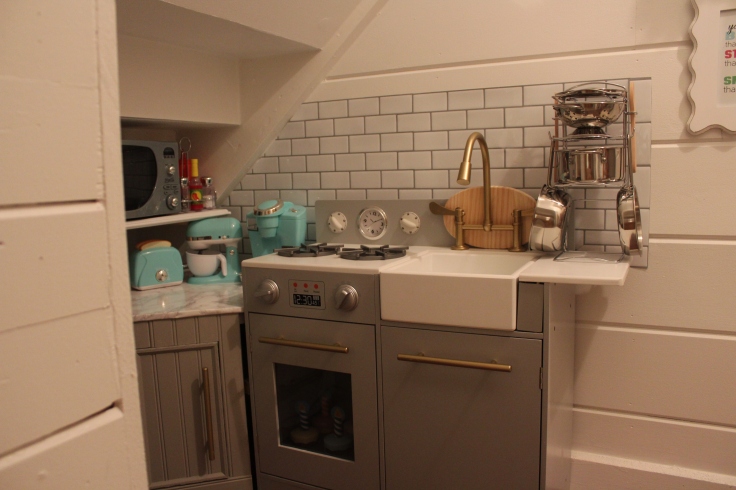
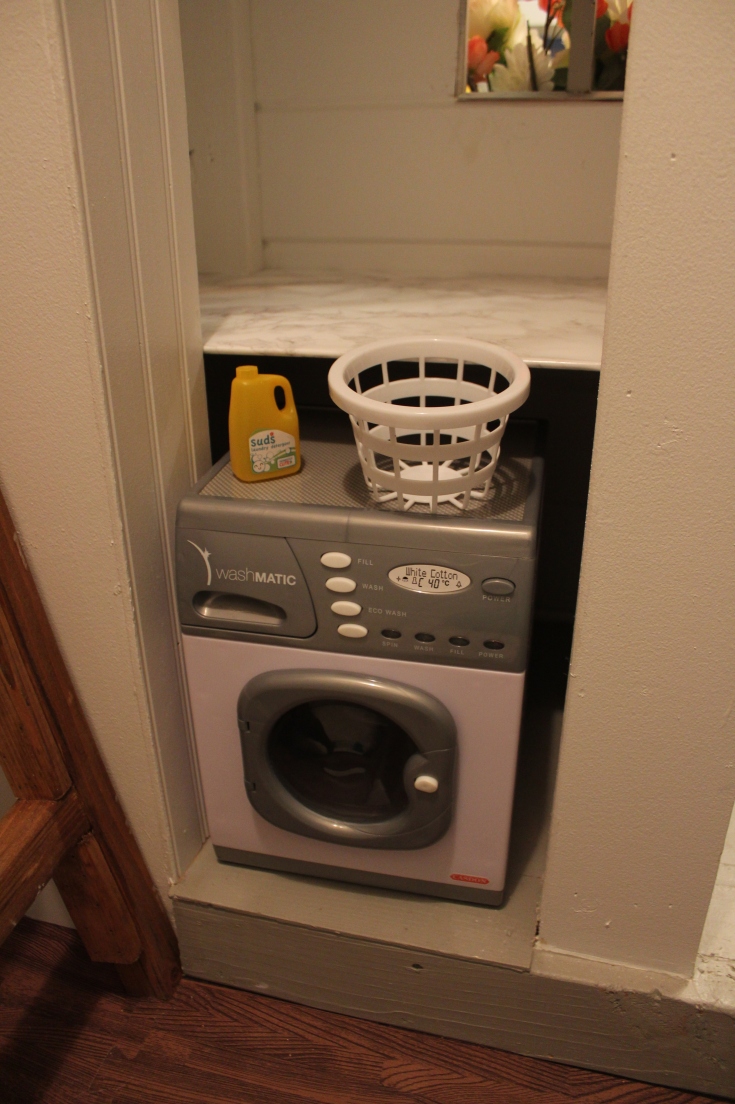
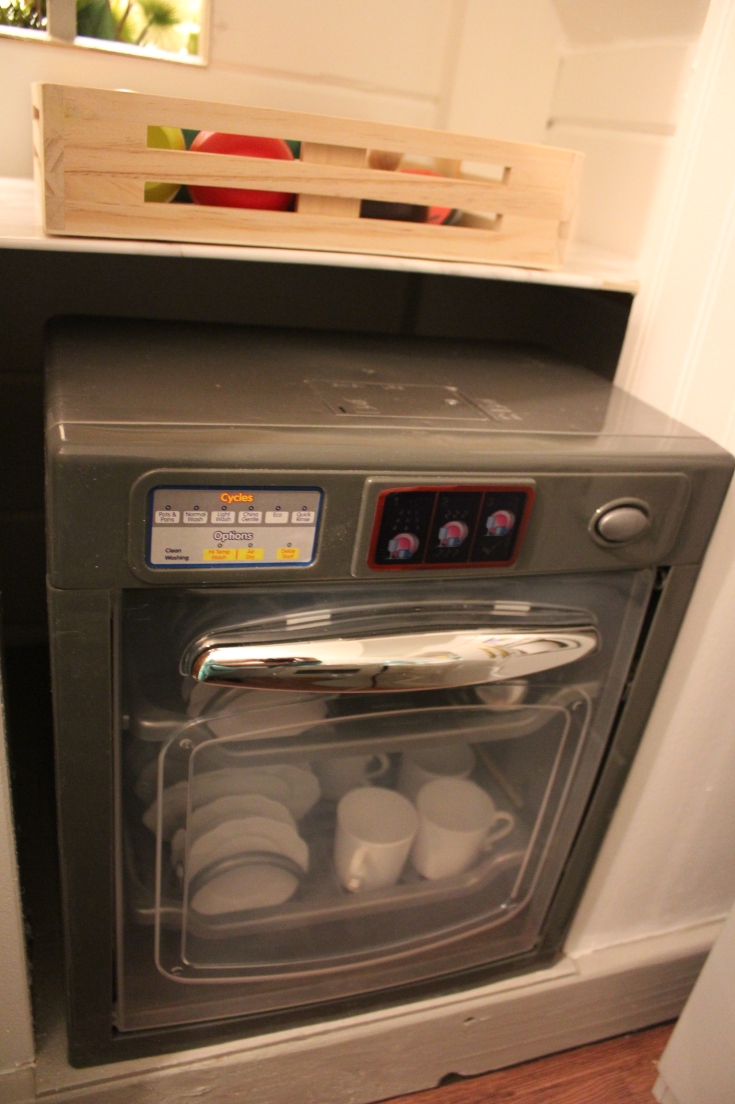
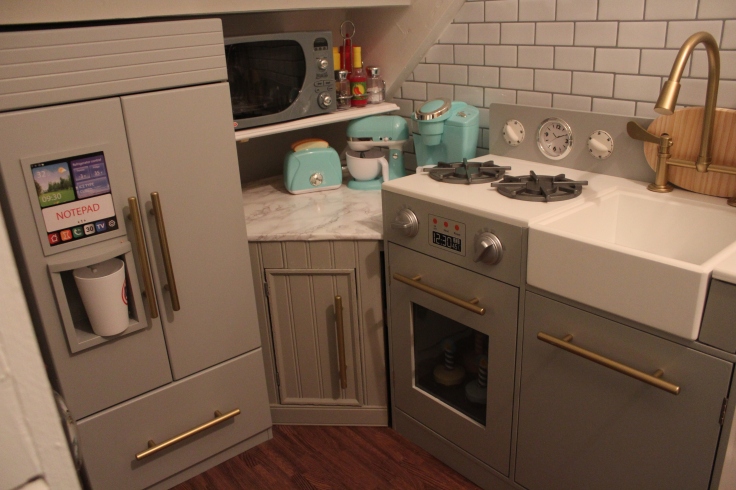
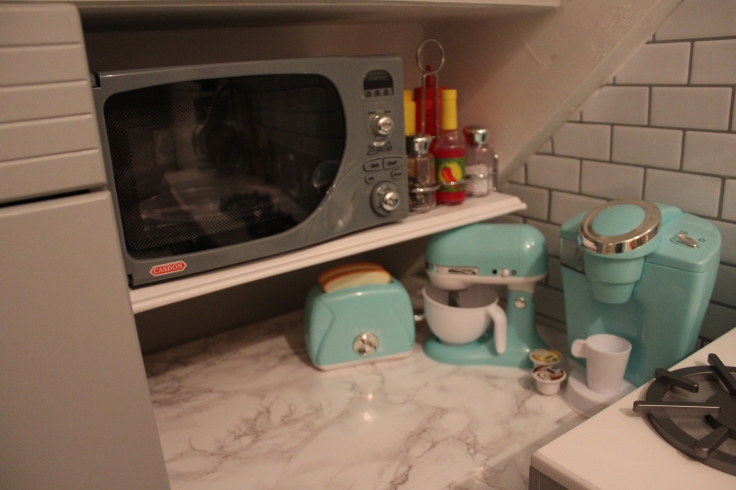
I found the most adorable kitchen on Amazon, again I didn’t want to go the plastic route, so this wood kitchen complete with farmhouse sink was perfect. We needed a two-piece set as well so that we could configure the set up how we wanted because of the limited space we have in there. Literally every centimeter counts! The only thing that I don’t love is that the wooden kitchens don’t have as many fun animations as some of the plastic ones do so I added a play microwave, dishwasher and washing machine for her to get to have some interactive play with.
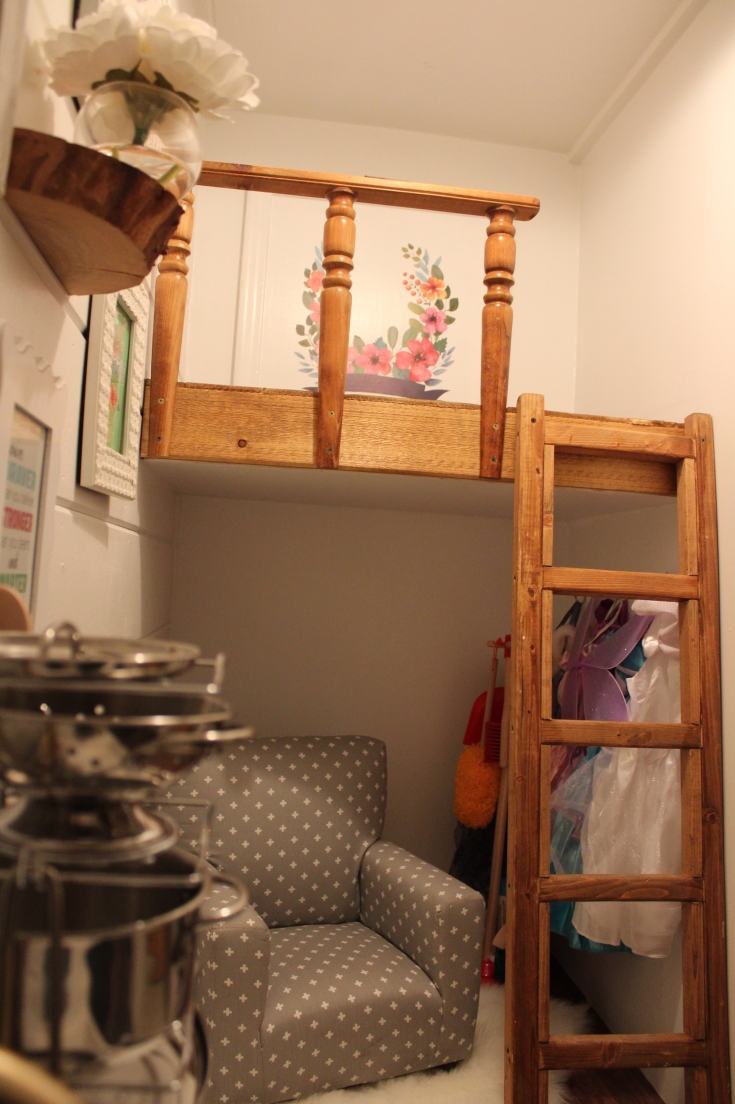
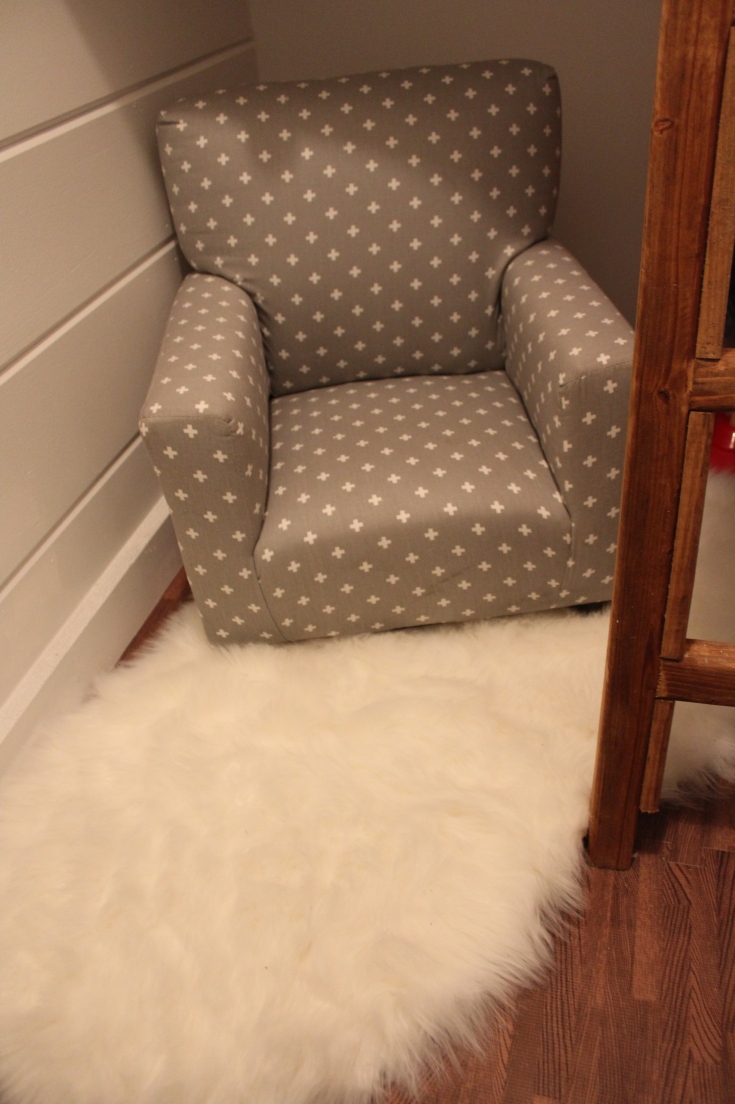
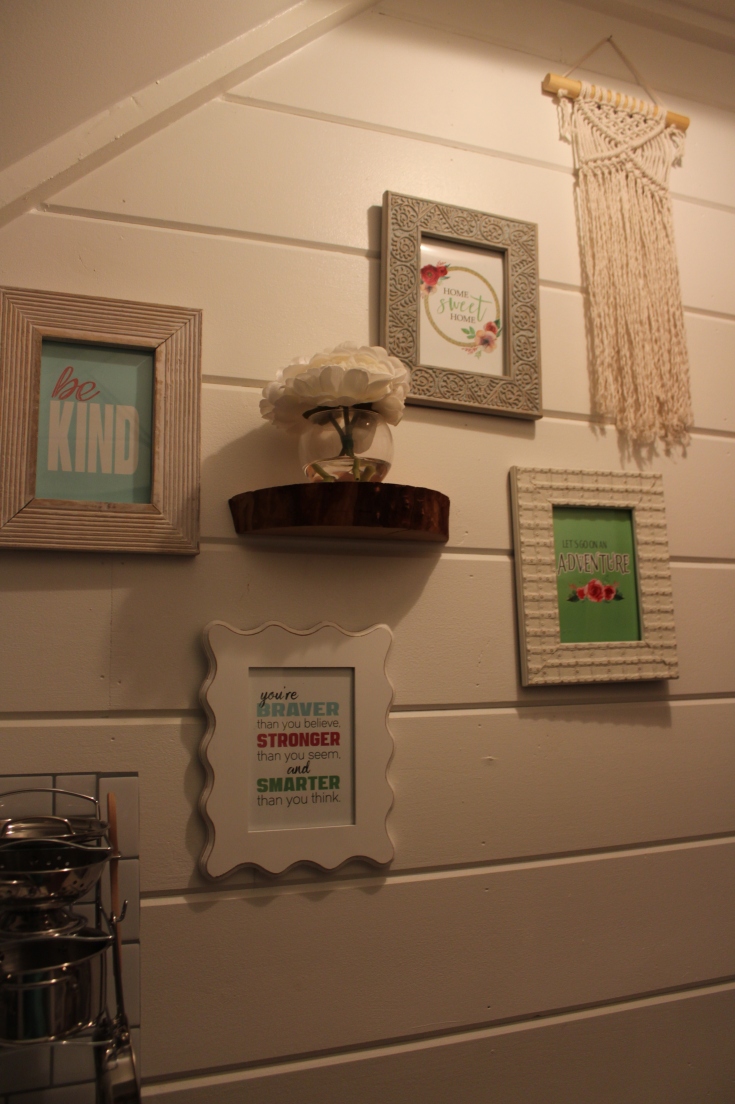
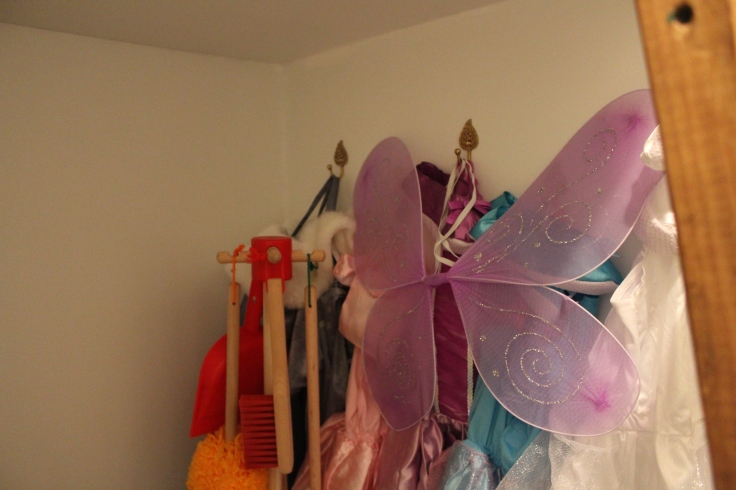
If I am anything, it’s a stickler for details. Like I said, I really wanted it to feel like a real home for her so we added a subway tile back splash (they’re stick-ons from Amazon), some under cabinet motion sensored lighting, and faux marble contact paper on the counter tops. Ammon built the counter and cabinet between the stove/sink and refrigerator so she’d have a place to cut her veggies, and prepare her five star meals and we’d have more storage for her toys while using up some of the blank space. We added a gallery wall with some cute images my sister made as well as a floating shelf from Ammon and a small macrame piece from moi because we’re a home of makers (you can find similar items in our shop)! The cute chair is from Home Goods and she has a corner with her dress up outfits and cleaning supplies because if she’s going to be a home owner then she’s got keep up on the chores! The ladder goes up to a loft space that leads into another small secret room where she can hang out and probably avoid us when she’s older.
Faux White Marble Contact Paper
I can’t say enough about how pleased we are with the outcome of this room. It was the perfect room to start off our basement remodeling with, and we are so glad about how it came together. It was the ultimate 6 week challenge and we are in love! I love all of the details and sheer love that was poured into this room. I seriously go down and play there by myself after the little one is asleep! I know that we will all cherish this room for years to come and am so grateful to have such a wonderful place for our baby girl to get to develop and grow.
Tell us what you think, we’d love you hear your thoughts!


It is amaizing! From the floor to heaven. Good inspiration, versatile and also looks ergonomica.
Congratulations and thank for allowd us to look at , it is an excellent share.
LikeLiked by 1 person